
Create a learning culture using virtual and hybrid Events. Deliver, manage, and measure engaging workshops and learning programs.
Table of content
- Events In a Nutshell
- Create an Event (Including Session details and Advanced options)
- Edit Event
- The Event Page
- Share / Assign an Event
- Members List
- Waiting List
- Event Settings
- How to set up a personal calendar in Juno
- Event Analytics
- Automations
Events In a Nutshell
Use Events to hold virtual or in-person gatherings for learning, networking, and idea sharing. It offers easy Event creation and management, session selection, and advanced options like manager approval and attendance tracking. With this feature, you can promote a culture of learning and collaboration, helping employees develop new skills and knowledge.
There are 4 types of Events - Event, Webinar, ILT, or Workshop.
Create an Event
To create a new Event, go to your Juno Journey homepage and click Create →New→Event.

- Event Title - The Event title will be added automatically to new sessions (Can be edited)
- Attendance type - The attendance setting dropdown lets the event creator specify attendance type in cases where there is more than one session, with tooltips for guidance. The available options are:
- “Choose one session”
- “Choose one or more sessions”
- "Attend all sessions"
- Session row: Collapsible item showing session details, including description.
- Add New Session - This lets you create an Event with multiple sessions. Clicking adds a session row.
- Event type - Event, Webinar, ILT, or Workshop. These affect the display label of the event and assist in filtering through the events.
- Advanced options: Set Event-specific options like manager approval or attendance limits.

Session details
To ensure a comprehensive and personalized Event setup experience, set up specific sessions with the following options:
- Date Picker: Enter the date and the start and end times for the session. This field is mandatory.
- Time Zone: Specify the time zone for the session. Note that this setting is relevant only for the individual session and defaults to your current time zone for new sessions.
- Session Title: Provide a title for the session. The default is the Event title, but you can modify it. Any changes to the Event title will automatically update the session title.
- Description: (Optional) Enter a detailed description of the session.
- Location: (Optional) Indicate the physical location of the Event, if applicable.
- Link: (Optional) If your session is virtual, add a link such as Zoom or Google Meet.

🔆 Keep in mind - Virtual meeting links will be active one hour before the meeting
Advanced Options
Create an additional layer of customization and control, ensuring your Events meet your needs.
- Training Team Approval: Employee registration requires approval from the Event creator, co-editor, or admin. See more information here.
- Manager Approval: Employee registration requires approval from their direct manager. See more information here.
- QR Code Tracking: Create a printable QR code to track attendance at physical events. Employees can scan this QR code to register their attendance.
- Guests can modify: Decide whether to grant invitees permission to make changes to the event in Google Calendar. Click here for important information about this option.
- Calendar Options: Defines the ownership of the Event/session calendar. The default is Juno scheduler, but it can be changed per Event.
- Limit: You can limit the number of registrants per session. Additional employees will be added to a waiting list and can be approved by the Event creator/admin.

Edit Event

The edit dialog is like a tool for modifying Events. It's similar to the creation form but with a few differences. You can't change the Event type or calendar options. However, you can choose from Events, Webinars, or ILT types (excluding workshops).
To open the edit dialog:
- Click "edit" to modify the current session.
- Click "New session" to create a new session.
Both buttons are in the top right corner of the Event page.
Email Notifications After Edits
When you make any changes to an Event, we want to ensure that you and other participants are notified appropriately. To achieve this, we have divided the Event fields into two types:
-
Important Information: Date, time, location, and link. Changes here can affect your response status. We'll make sure to notify you automatically.
Optional fields: Title and description. Changes here may have minimal impact. We'll just ask if you would like to notify others. Options:
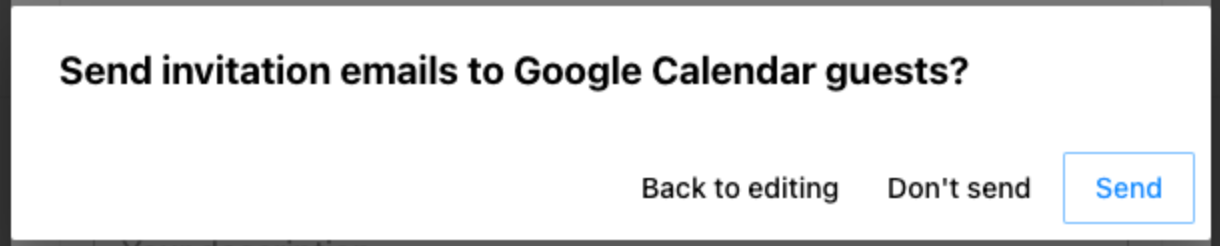
- Send: This Event updates the Event and sends a notification to the other participants.
- Don't Send: This Event updates the Event without sending any notifications to others.
- Back to Editing: This option allows you to return to the editing screen without making any updates.
By categorizing the fields and providing notification choices, we aim to ensure that you stay informed about significant changes while avoiding unnecessary notifications for minor updates.
The Event Page
Event Creator View:
- Sessions Navigation: Easily navigate through the Event sessions.
- Automation, Settings, and Share Options: Find more information and options related to automation, Event settings, and sharing.
- Edit/New Session: These buttons open the edit dialog and make session changes. Please have a look at the Edit Event section for detailed instructions.
- QR Code: If the QR code toggle is enabled in Event settings, a QR code will be displayed for attendance tracking.
- Event Date: Shows the Event date, start time, and Event time.
- Session Attendees: Indicates the number of attending members. Only visible if there is a limit on attendees.
- Event attachment: This Event has an attached course exclusively available through the Event and not in the company catalog.
- Session Creator: Information about the creator of the session.
- Members and Waiting Lists: Refer to the Members and Waiting Lists section for further details.

❗️Note:
If, for any reason, the system fails to create the Event, a "Retry" button will appear under the "Share" button.

Learner View:
Before Registration:
-
A "Sign Up" button will appear at the page's top right corner if a user isn't registered.

-
When the "Sign Up" button is clicked, different options will appear based on the attendance type of the Event.
When joining an event with the attendance type “Choose one session” or “Choose one or more sessions” the invitee is presented with the chart below and is able to select which session they would like to join. When choosing one or more sessions the options become checkboxes. Once a session is selected and confirmed the invitee will receive a Google calendar invite.

After Registration:
Once the employee is registered, they can click on the "Change sessions" button to leave or join additional sessions.

Approval Required Events
-
Event with Training Team Approval: Employees who click "Join Session" are added to a waiting list. A note saying "Waiting for training team approval" will show up.
-
Event with Manager Approval: After clicking "Join Session," a message tells the employee that their manager needs to approve their request. Once the manager approves, the employee is officially registered.
-
Limited Seat Event: These Events work similarly to the "Event with Training Team Approval." Once employees click "Join Session," they're on a waiting list.
🤔 Keep In Mind
Employees joining Approval Required Events are placed on a waiting list. Click here for more info.
Share / Assign an Event
Sharing an Event on our platform is made easy through the "Share" button in the top right corner of the Event page.
How to Share / Assign
- Click on the "Share" Button.
- Invite Members - Specific Employees or Groups.
- Choose permission (Learner or Editor).
- Click Assign
There are three different flows depending on the three different attendance options. All three options start with a similar share page:

1. Choose one session - The event creator can enable invitees to pick their preferred session through a straightforward email link with a "Select Session" button. Alternatively, for a more curated experience, creators can directly invite learners to a specific session, using the interface pictured below.
2. Choose one or more sessions - This attendance type has settings similar to the “Choose one session” option, but the invitee can choose multiple.
3. Attend all sessions - Invitees are invited to all sessions in the event.


💡 Important
If an event creator chooses to invite employees to pick their session, these employees will receive an email invitation to the Event.
They will only see a calendar invite after registration.
Members List
The Members List in an Event shows all the users invited to a specific session and whether they've accepted it. In a Workshop, the list is the same for all sessions, but each person might have responded differently.
View for Admins or Event Creators
If you're the admin or the one who created the Event, here's what you'll see in the list for a future or ongoing session:
-
Search Input: Find a specific user in the list.
-
Sort Option: Arrange the list by name or by response status.
-
Export Button: Save the list with details like User, Email, Response status, and Attendance status. You can include more information like department, location, etc.
-
Select All: Pick all users in the list at once, useful if you want to remove everyone from the list.
-
Remove Button: Take out selected users from the session. In a Workshop, it removes them from all sessions. These users receive an email about the Event cancellation, and it also disappears from their calendars.
-
Response Status Chip: Displays if the user is Going, Not Going, Maybe, or Waiting (Waiting -> waiting for user reply).
-
Not Sent Chip: Indicates that the invitation didn't reach the user.
-
Check Box: Pick specific users.

After the Session:
When a session concludes, the response status chip changes to an attendance chip, indicating whether the user attended the session. This can be changed by clicking on the chip (Creator only).

If the Invitation Wasn't Sent:
If a user was added to the session, but the invitation wasn't sent, the user will appear in the Members List with a "Not Sent" chip. You can try to send the invitation again by clicking on the chip. This opens a popup with options to try and resend or remove the user from the list.
Inside the popup, you'll find:
-
Resend Invitation: Try to send the invitation again.
-
Stop Trying: Remove the user from the list.

Waiting List
The Waiting List comprises employees who have been invited to or have joined a session but are waiting for approval. Once approved, these employees will only get emails, calendar invites, or updates about the Event.
Waiting List Guide:
- Search Input: Find a specific employee on the waiting list.
- Export Button: Save the waiting list with details like User and Email. Additional information about the employee, like department, location, etc., can also be included.
- Select All Button: Picks all employees that can be approved from the waiting list.
- Approve Button: Approves employees for the session, moving them to the Members List.
- Remove Button: Deletes employees from the session.
- Status Chip: Shows the employee's status within the waiting list (for example, if the employee is awaiting manager approval or credit approval).
- Check Box: Select a specific employee.

Employees will enter the Waiting List for one of the following Event types:
-
Training Team Approval Event: This Event requires approval from the training team (creator or co-editor of the Event) or an admin. Employees joining or assigned to such an Event are added to the waiting list and wait for approval. These employees will appear on the waiting list with a "Waiting" chip.
-
Limited Seat Event: This Event has a limited number of seats. If the seat limit is exceeded, employees joining or assigned to such Events are automatically added to the waiting list and wait for approval. These employees will appear on the waiting list with a "Waiting" chip.
-
Manager Approval Event: This Event requires approval from the employee's direct manager. When an employee joins or is assigned to such an Event, a request is created for approval on the employee's direct manager's budget page. These employees will appear on the waiting list with a "Pending Manager Approval" chip. The admin/creator can't approve them from the waiting list.
Event Settings
Event settings apply to the whole Event, not specific sessions. Here's what each setting does:
- Event Title: This is the name of the Event. Changing this won't change the titles of the sessions.
- Event Description: This is a brief summary of the Event. Altering this won't affect the descriptions of the sessions.
- Event Card: This setting determines how the Event will appear in the company academy and "My Content" section.
- Event Tags: These are keywords associated with the Event (e.g., React, Managing Tools, etc.).
- Audience: Specific groups can be added here, which will limit the visibility in the company catalog.
- Delete Button: Clicking this will erase the entire Event and all its sessions. All session members will receive cancellation emails.5

Setting up your personal calendar in Juno
By default, whenever you create an Event on Juno, the invitation will be automatically sent out. If you prefer the invite to be dispatched from your personal calendar (personal email account), you can integrate it into Juno.
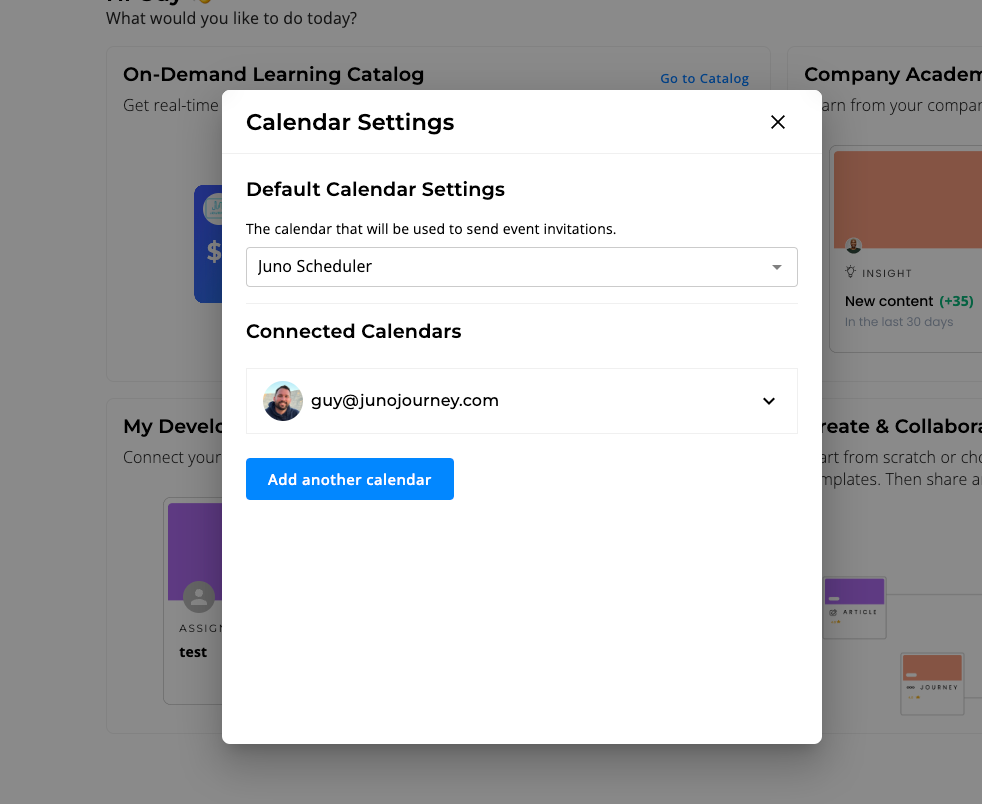
To do this, follow these steps:
- Go to the Juno journey homepage.
- In the bottom left corner, click on your name.
- Then click on "Calendar Settings".
- Next, click on "Add Another Calendar".
Once you have set up your personal calendar, you can choose it when creating an event. Simply click on "Advanced Options" on the event creation page, and then click on "Calendar Options".

❗️ It's important to understand that if the "Guests Can Modify" toggle is turned off, guests will be unable to change Event information such as time, date, or location. If you, as the Event creator, want to edit the Event through your personal calendar, make sure to set it up in the "Calendar Options" section.
Remember that as the creator, you will always be able to edit event details from the event page.
Event Analytics
A quick and efficient tool for viewing engagement metrics in numerical form, giving you an instant snapshot of your event's performance. Here's how you can use it:
How to Access Event Analytics
- Click on Admin from your dashboard.
- Navigate to Content.
- Select Event Management.

Automations
Automating actions lets creators decide which attendance statuses would trigger the automation and gives them the ability to set automation at the session level and not just the event level.
